Increase Conversions With Unique Image Editing Tool In AliDropship Plugin

This article is dedicated to the use of WordPress Image Editor – a handy tool that was developed to help dropshipping store owners create appealing product images in mere seconds.
Remember your everyday dropshipping routine: your store runs smoothly, AliDropship plugin automatically uploads the desired products from AliExpress, you edit them and everything is just fine, but…
Every time you need to alter images to create a perfect pictures gallery for your product page, you have to get distracted and open Photoshop or another editor. This is your only way to erase the original seller’s watermarks, or crop the images, or enhance the picture quality in some other way (and why on Earth do these photos require so much editing?!)
Luckily, you don’t have to waste your time on extra editing services anymore: with the Image Editor from AliDropship team, you are able to create beautiful and catchy pics in no time at all!
Why are dropshipping store owners happy to use Image Editor?

Actually, some of the buyers don’t even read product descriptions before buying – “why should I read something if I see all necessary product features in the pictures?”
Indeed, there’s no doubt that product images are a vital source of information for buyers. That’s why these pics should look perfect and, on top of it, they shouldn’t contain any other sellers’ logos – otherwise, customers will think you’re a reseller. Even though reselling is okay, people don’t really like the fact they have to overpay, and we don’t want to upset our precious clients.
So, your task is to edit every single picture on every product page to make sure none of them contain AliExpress store numbers, or other texts, or watermarks, or anything suspicious. Plus, you need to crop images if necessary, edit their brightness and contrast, and do lots of other tiny amendments to make the pictures look professional and stylish.
So, as you know, the higher your product images quality is, the more attractive your products look to your prospective customers, and the more purchases they make.
But how should you edit pics, technically?
It’s not always easy to find a suitable online image editor – does it mean that every time you need to resize or lighten a picture, you need to put aside your current tasks and go deep into exploring Adobe Photoshop?
Absolutely not!
Image Editor from AliDropship team helps you use your time efficiently and waste no second on the pictures’ altering!

Our team created the WordPress Image Editor as a powerful built-in tool that helps you make changes to product images in seconds. You can access it through AliDropship Chrome Extension, or you can open it right in the WordPress admin.
Everyone can use the Editor because its layout is super accessible. There is nothing complicated about the Editor functions, and all your job gets done in 3 simple steps:
-
- Open
- Edit
- Save
Done!
And here’s the best news: it’s free for all AliDropship plugin users!
So, your benefits are obvious:
- You can play with this tool conveniently (it’s absolutely user-friendly)
- You spend no money on working with this WordPress photo editor, and you don’t also have to get a paid subscription to any external editors
- You save hours of your time: the Editor has numerous brilliant functions all gathered in one place
Please welcome Image Editor – the tool that saves your time, money and nerves.
What’s inside?

Let’s take a look at WordPress Image Editor features.
We will start with editing our product picture.
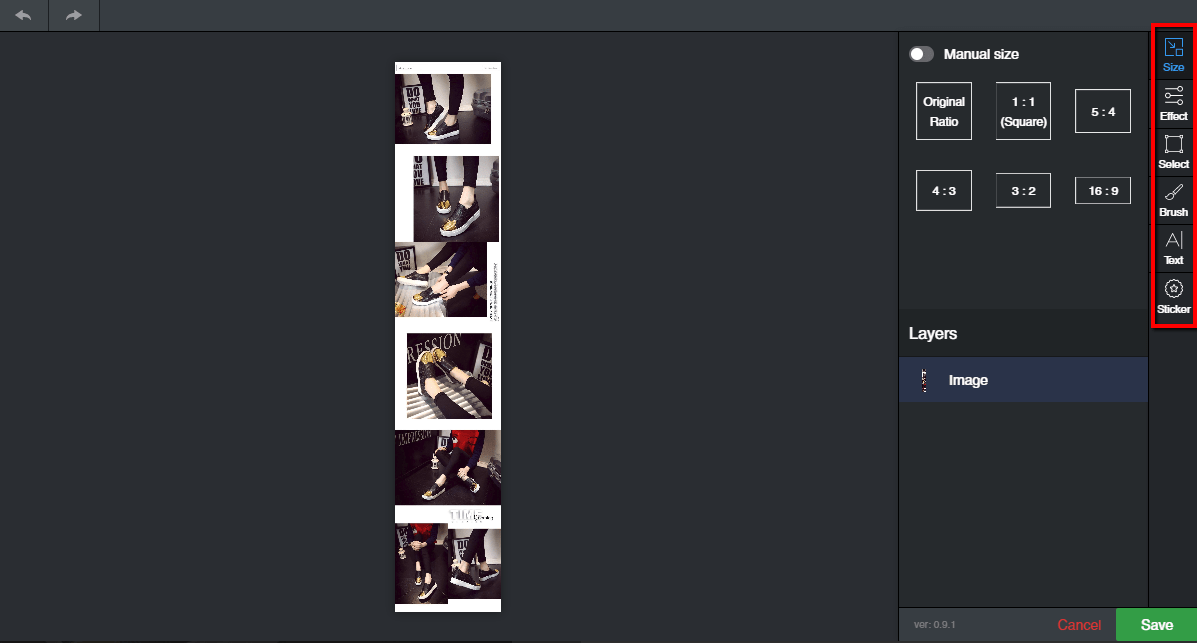
While you’re only importing items from AliExpress, or while you’re already editing a product page, click on any image you need to edit (or mouse over the featured image if you want to alter it). A pencil icon will appear in the image corner – click on it and do the magic!

You will see an Image Editor window opening – here, you need to take a look at the right column. It contains the list of all the functions you can use for editing. By clicking on the relevant icons, you can change image size, add effects, draw, erase or type something, or add a sticker.
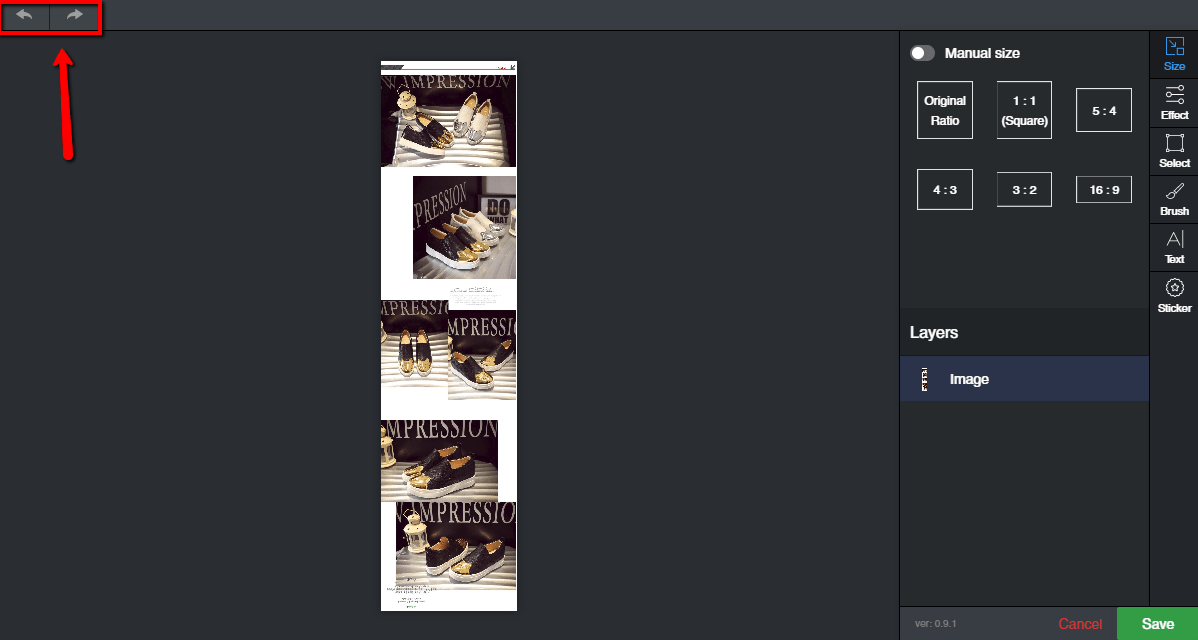
You can undo or redo any action using arrow buttons.
Now, let’s look at every function closely.
Change the size of an image
To cut your image, just choose the ratio you need and click on it. For example, we’ve chosen 1:1. Now the image (its part) is put in 1:1 frame. You can pull the image up and down in it and choose a particular part of a pic you want to show.

Add a visual or a lightning effect
- Lightning effects
If your product picture seems to be a low light photo, it would be great to enhance brightness and contrast to improve colors. The brighter and more aesthetically pleasing your pic looks, the more expensive the featured product looks.
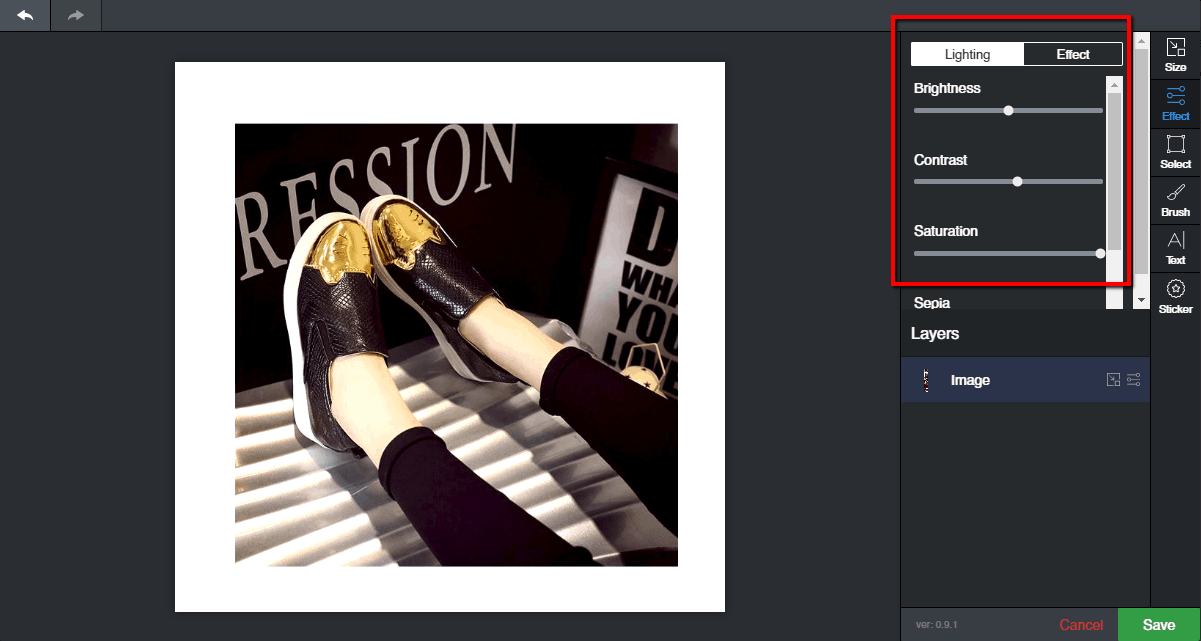
You can also convert the images into the grayscale mode or even invert colors.
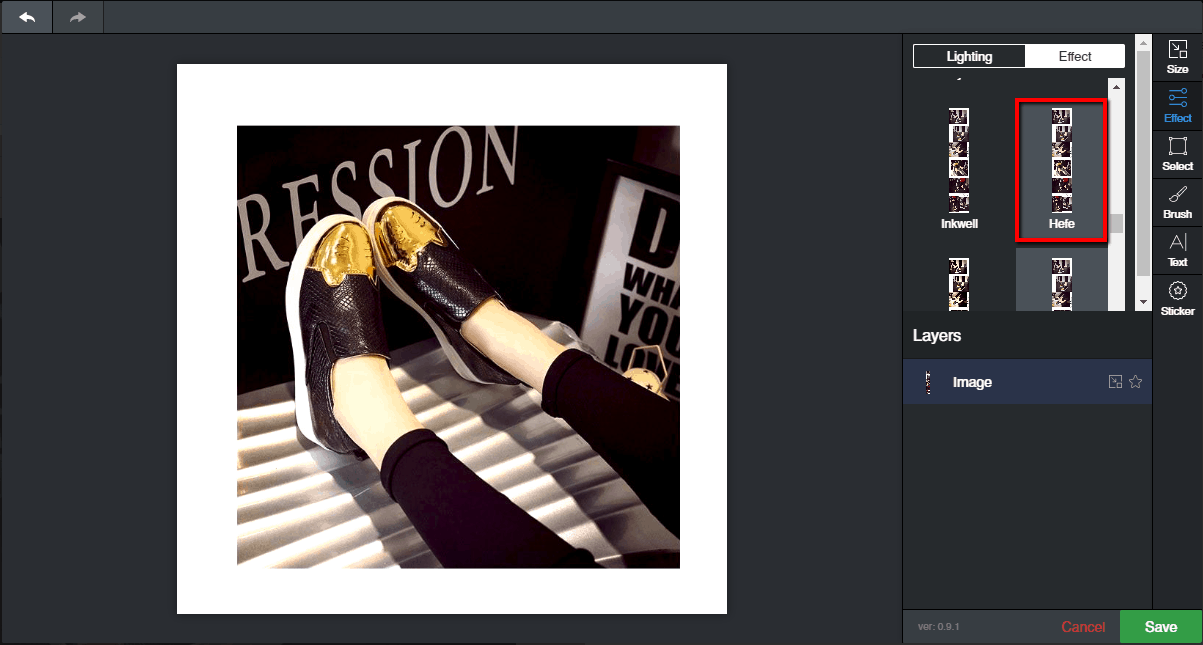
- Visual effects
Add any filter you fancy – the functionality is similar to the Instagram filters. All of them provide a lovely-looking result, but it’s still better to go easy on them 🙂
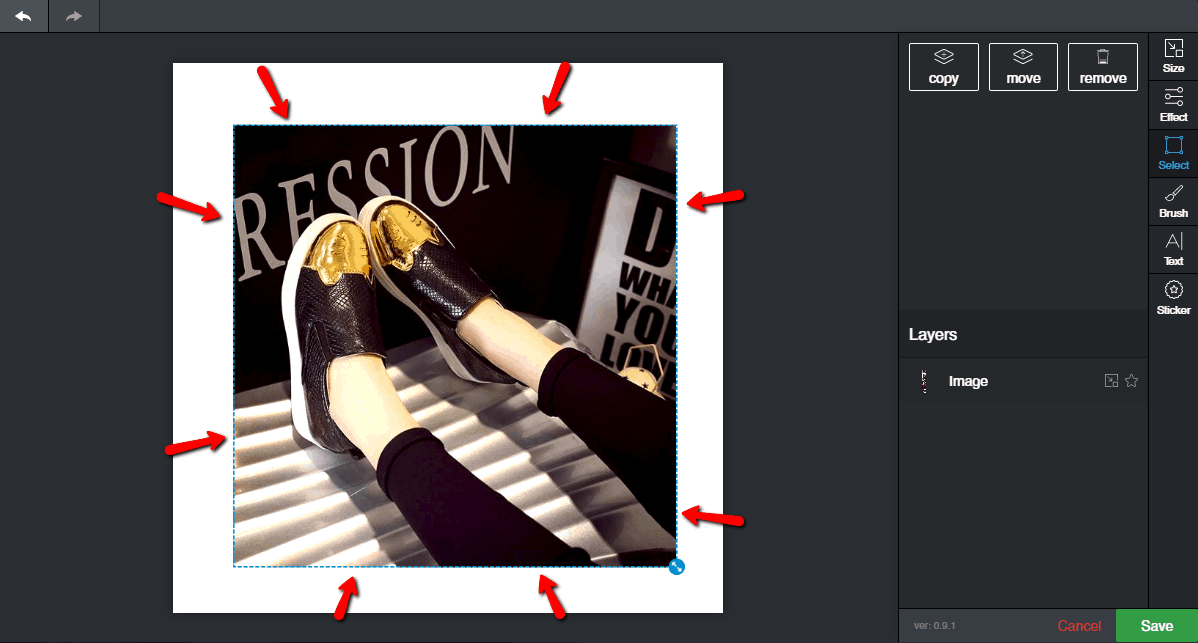
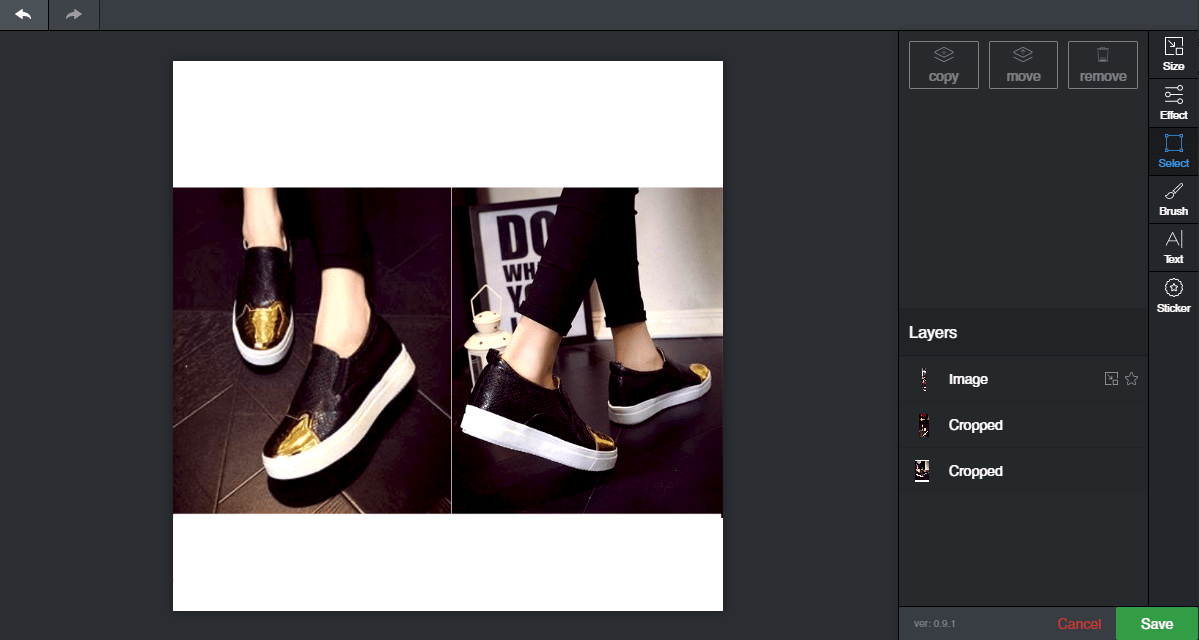
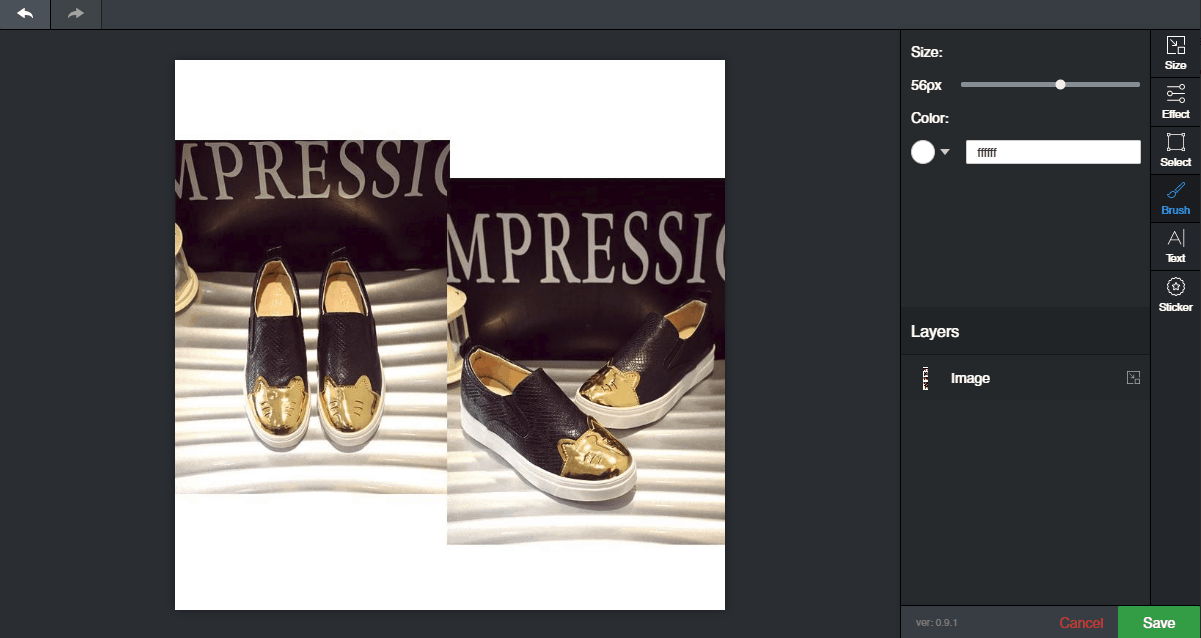
Select or move a specific part of an image
Select some part of an image: click on it, hold, drag the square, then release. That will be the area we’ll work with.
Click on the ‘copy’ button to duplicate this area, then drag it to the place you need (this option will definitely help you to overlap some unnecessary AliExpress store labels with a part of a background). You can also change the size/rotate the area using that little blue round arrow “buttons”.
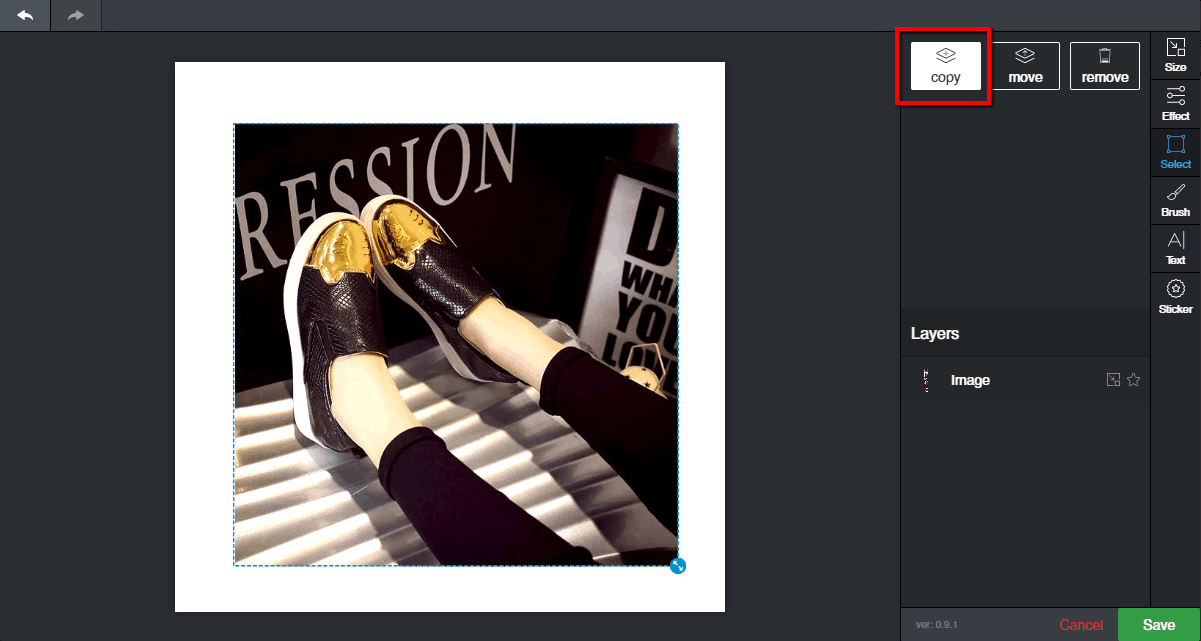

Voila! This photo is done just in seconds! But we have others, let’s edit them too.

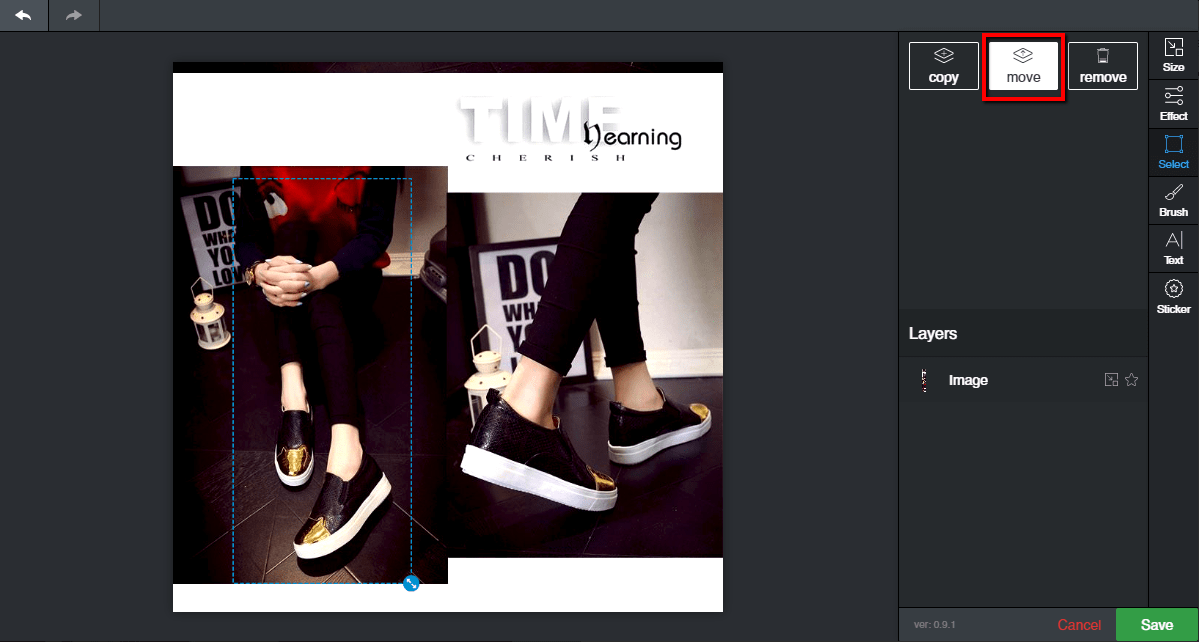
Click on the ‘move’ button to cut the area, and drag it anywhere you want, resize or rotate it. This is how you can move objects in the picture.

Click ‘remove’ to delete the area you’ve chosen if you don’t want some parts of the pic to remain. Neat!
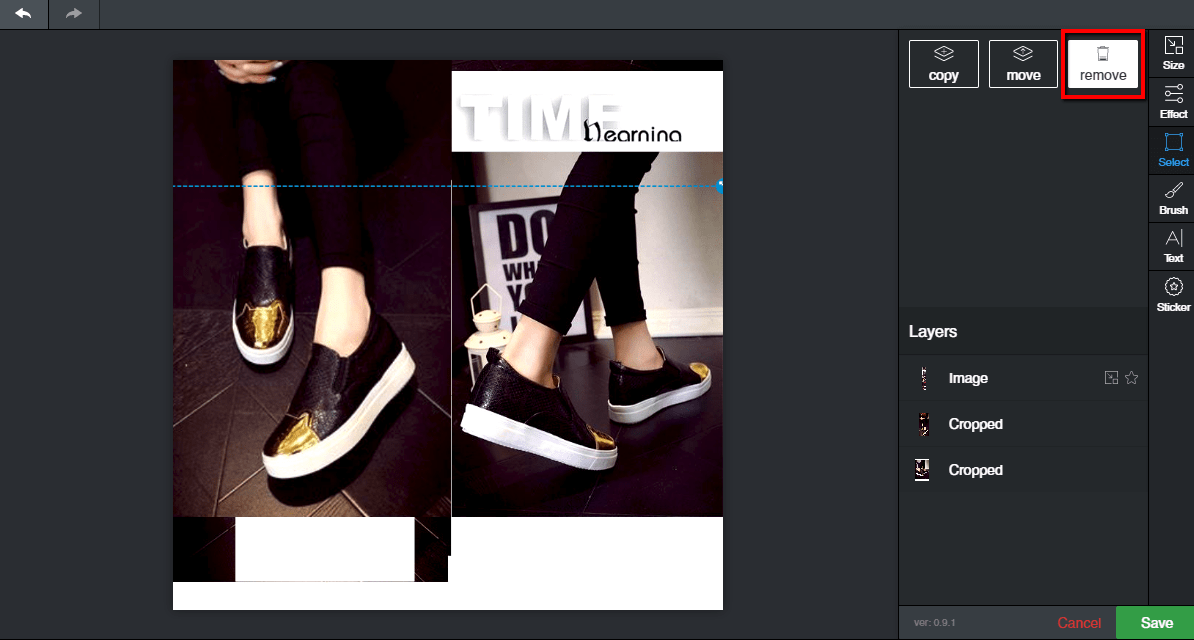
You can use ‘remove’ function to delete AliExpress store labels.
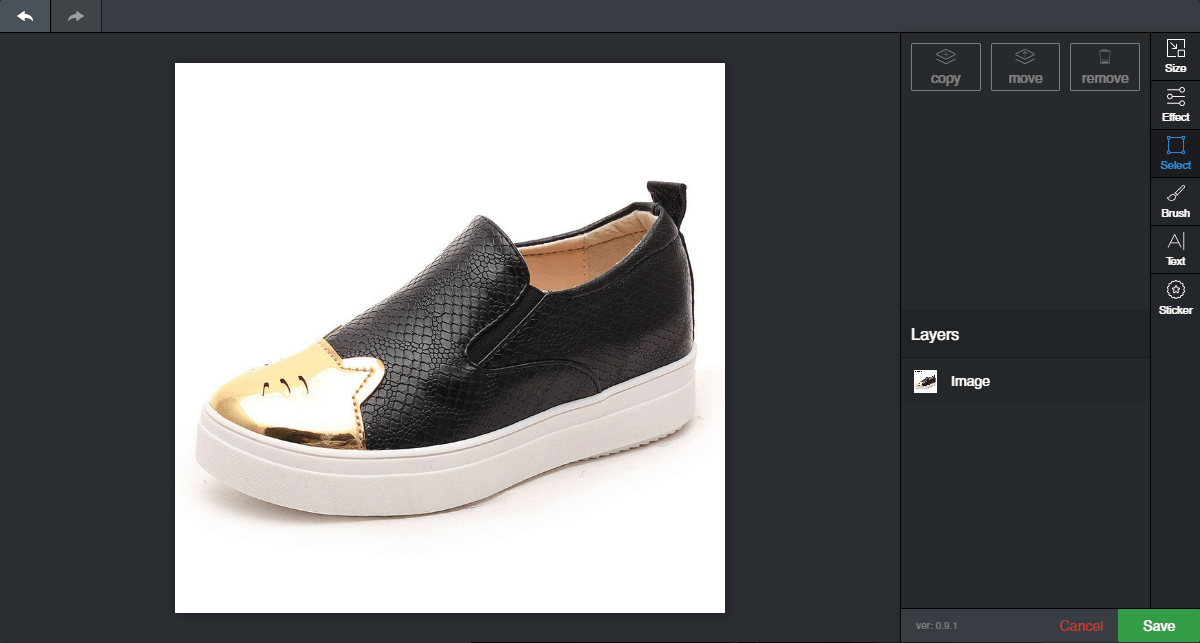
The difference is obvious. Just one click makes your product look way more expensive and appealing!
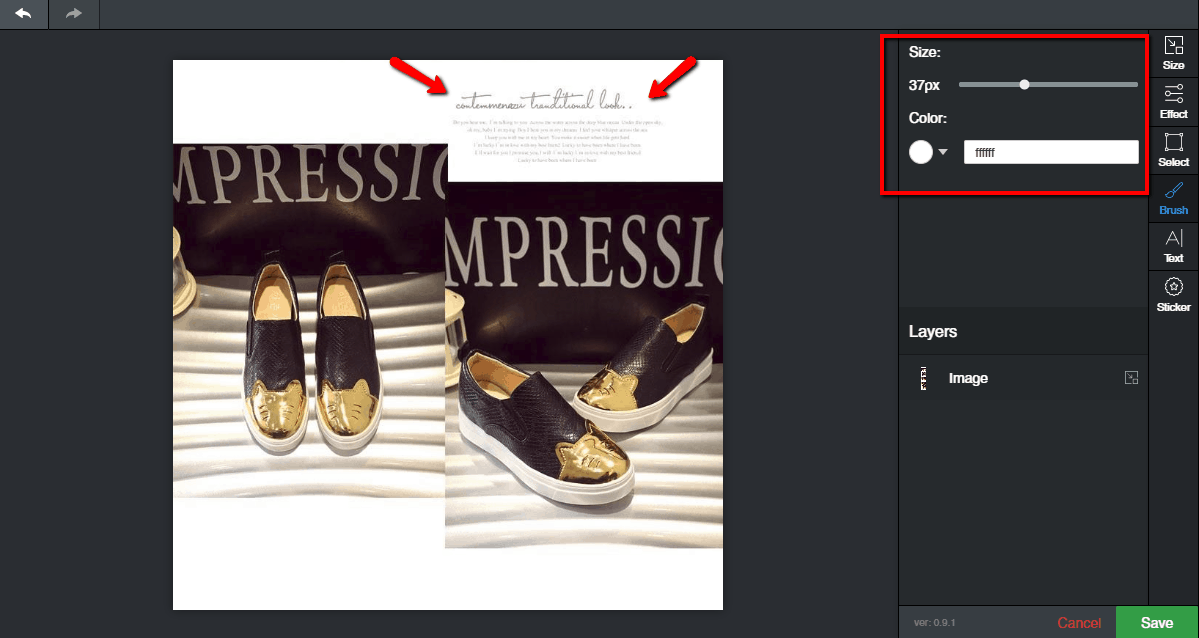
Use the brush tool
Select the brush size and the color – you can also type the code of the color you need. Show Pixel Color extension will be of much use here: set it up, open, click on the color in the picture and voila! – the color code is shown, copy it and paste into the color code field. Then, paint any Aliexpress seller labels over. Or draw something 🙂
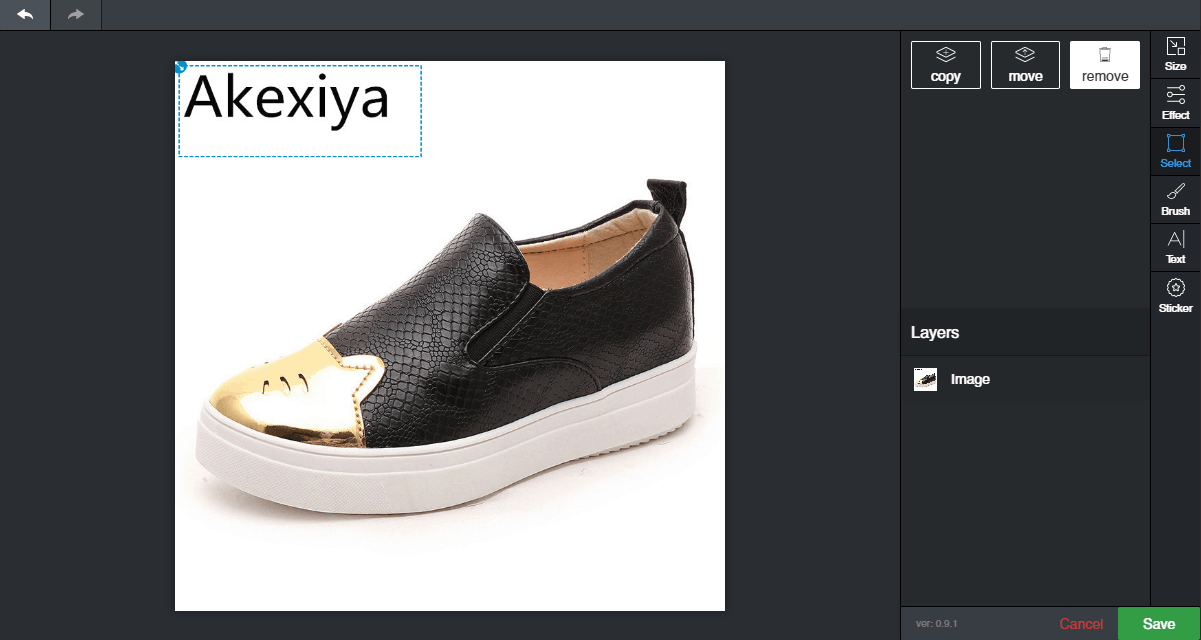
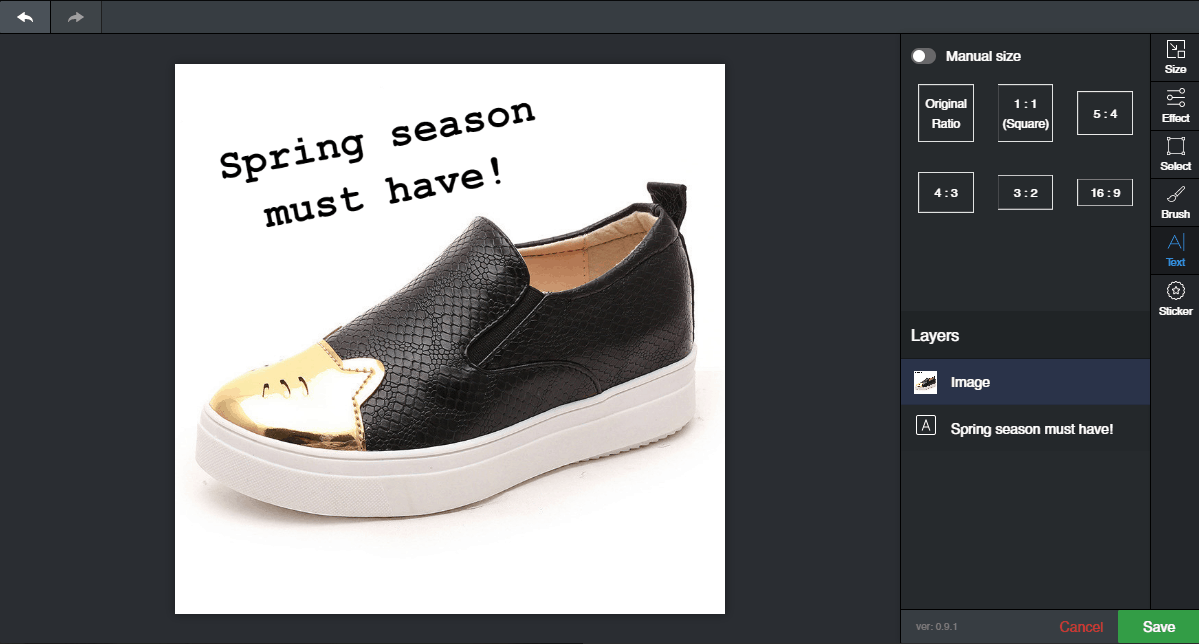
Type something
Enter the text, choose its color, size, font, style and alignment. As you can see, you are able to adjust everything! Move your text to its place, rotate it if necessary. Great!
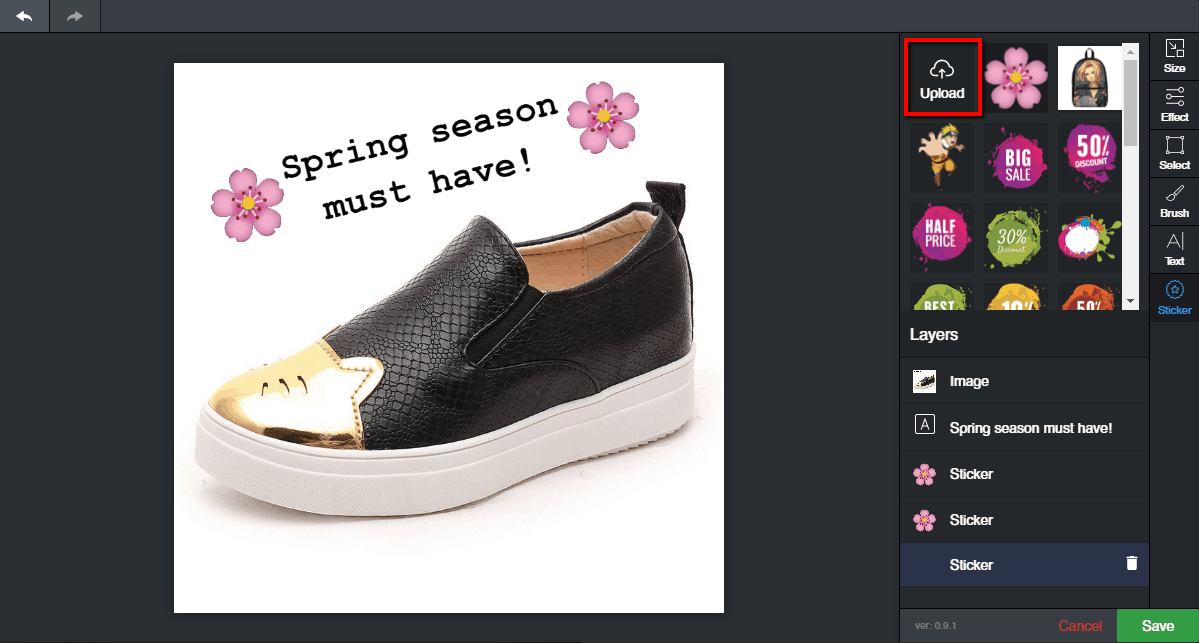
Add a sticker
Click on any sticker you like (it will pop up in the picture), then move it. And here’s the best part: you can easily upload any .png or .jpg format image to use it as a sticker!
Save the fruits of your labor. Easy-peasy!
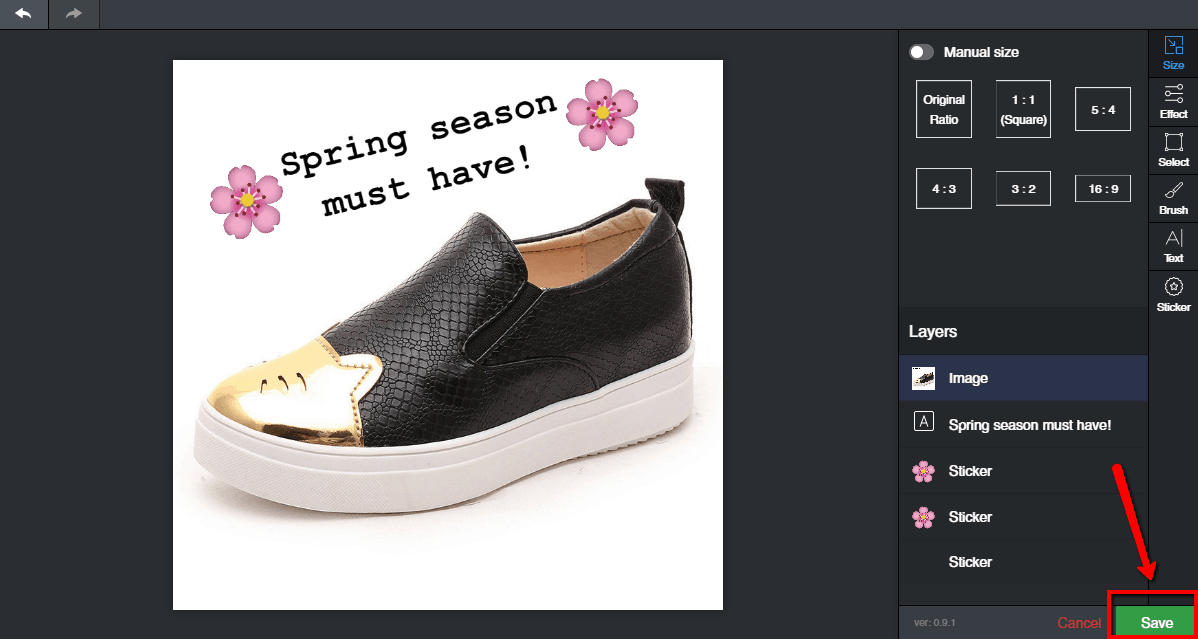
Now your product images look more attractive and the product page gets an improved conversion rate!
We hope this article will be really helpful to everyone who wants to optimize their dropshipping store.
As you can see, with the help of the Image Editor, it gets much easier for you to run a beautiful, credible and profitable dropshipping store. Have you already tried it?
tutorials and special offers from AliDropship
Recommended for You


Grate, good work. Helpful.
Thank you 🙂
I really love the image editing tool with the plugin. Awesome work, I must say, saves hours of work. But still, it would be perfect if there was option to add some basic shapes, e.g. rectangle, circle, triangle etc and the ability to fill the shapes with solid color or gradient. I hope you will add that feature soon.
Our team works on Image Editor improvement, and they will keep your recommendations in mind! Thank you for your feedback! 😉
Great tool and tutorial. Thanks.
Minor suggestion: control-z for undo-last-operation. It’s almost universal in computerdom, including WordPress.
Thanks for all you do.
I’m glad you liked the tutorial, Richard! Thank you for the suggestion, this keyboard shortcut is really useful 🙂
I must say, if we use this tool in the way it’s meant to be used then we will definitely get some tremendous results.
Agree! 🙂
It would be better if you explain it with a video.
The video tutorial is already made, you can watch it in our knowledge base.
IT’s all good, but it doesn’t have the basic “Cut” option. I wonder why? 🤔
Oh, it has a cut option! You can cut some parts of an image in the ‘Select’ tab of Image Editor with the ‘Move’ button. The part you’ve cut will become a new layer (like in Photoshop) and will appear in the layer list. If you want to delete it, just click a little ‘bin’ button next to this layer.
Diana, yes, I’ve noticed that. But I was thinking more of like “cut” in Photoshop or other editors: you basically choose the part of the image I want to keep and then click “cut” with all the rest of the image been deleted. Like in your example with “Remove”: I’d simply select just a shoe in the center and then just click “cut” and I’d have a smooth bigger image of the shoe with all the text and unnecessary white background been deleted.
You know what I mean? 🙂
Yes, the featured image, gallery pictures and photos inside the product description can be edited thanks to the added features. But I’m unable to edit the pictures with sellers watermarks on the product variation page. Is this possible or am I missing something?
You can easily remove sellers’ watermarks from pics of product variations in the ‘Attributes’ tab 🙂
thanks
DIANA
Does the Woo version of AliDropship plugin support the image editor (for both pre-import product photos and directly for photos on wordpress)?
Thanks!
Hello! Yes, it does!
Can someone explain me how to edit already imported images. Alidropshipp Woocommerce
I’m having some supplier with images that has graphic and text watermark overlay over it.. to a point editing is very troublesome. is it advisable to request the supplier for images without watermark? is it okay to do that?
Yes you can ask the supplier but I am nor sure if he can help. I can recommend that you try import products with DropshipMe plugin. It offers already edited items with edited images https://dropship.me/
Hi, great tool and tutorial, thanks for sharing.
But one thing I’m wondering, is this plugin compatible with the alidropship woo plugin?
Hi, yes of course, it is also integrated with AliDropship Woo plugin.